
What Is a Membership Website?
A membership website is a website where people can sign up and become members in order to gain access to exclusive content or services. Usually, these sites are subscription-based, meaning people have to pay a monthly or yearly fee to become members or stay active. However, this is very different from a subscription-based model (see below). All the same, memberships can either be free, require payment, or they can feature a mixture of both. There are many different types of membership websites, but the most common ones are content websites and e-commerce websites. Content websites invite visitors to access exclusive articles, online courses, downloads, videos, and more. An e-commerce website lets you buy products or services that are not available to the general public.Membership vs. subscription websites: What’s the confusion?
You may have heard the terms “memberships” and “subscriptions” used interchangeably. But while both concepts are closely connected, they are not the same. At its core, a subscription is a financial contract that offers periodic use or access to a service or product. It’s more based on a financial concept compared to memberships. A great example is a service like Netflix, where you have to pay a regular fee for entertainment. Meanwhile, memberships offer much more: Users not only get access to gated content, but they also get to enjoy the privilege of belonging to a community, access to networking opportunities, and other non-financial things. To keep it simple: Membership sites offer exclusive content and/or services, while subscription websites don’t.Beginners Guide: How to Create a Membership Site in WordPress for Free
This guideline applies to both WordPress platforms—whether you’re using the self-hosted version of WordPress (WordPress.org) or the hosted version (WordPress.com). For the self-hosted version, you should have the following checklist:- A domain name: This is a unique web address of your website. It looks something like this: Google.com or WordPress.com. To customize a domain name, you can use this guide.
- A WordPress hosting account: Simply, this stores your site’s files and data.
- An SSL Certificate: The digital certificate that provides a secure connection for your website to accept online payments by using HTTPS. To get an SSL Certificate, see our packages.
Choosing a membership plugin
To create a membership website with WordPress, there are a lot of free and paid WordPress membership plugins available for use. And each one of them has its pros and cons. For the purpose of this article, we will use a free version—and specifically: Paid Memberships Pro plugin. This is because besides being a free plugin, it also has all the support features and add-ons for creating a membership website. If you want to access extra features, you can always upgrade to the paid plans. However, whenever you want to create a membership website, PMPro is not the only free plugin you can use. There are other versions like Ultimate Member, Simple Membership, or WP-Members which can still serve the same purpose. The good news is that the process to set them up is pretty much the same. It’s also important to note that before you choose a membership plugin, always consider the type of membership you want to create. Whether you want to create a club membership, non-profit, or for business, the type of membership site will help guide you towards choosing the right plugin for your needs.The 7-step guide to creating a membership website (Paid Memberships Pro plugin)
Here’s how you do it.Step 1: Install and activate Paid Memberships Pro plugin
The very first thing you need is to install and activate the free Paid Memberships Pro plugin. To do that, navigate to Plugins on your dashboard > Select Add New. Search for Paid Memberships Pro plugin and click install. Now, you can go ahead and activate your plugin.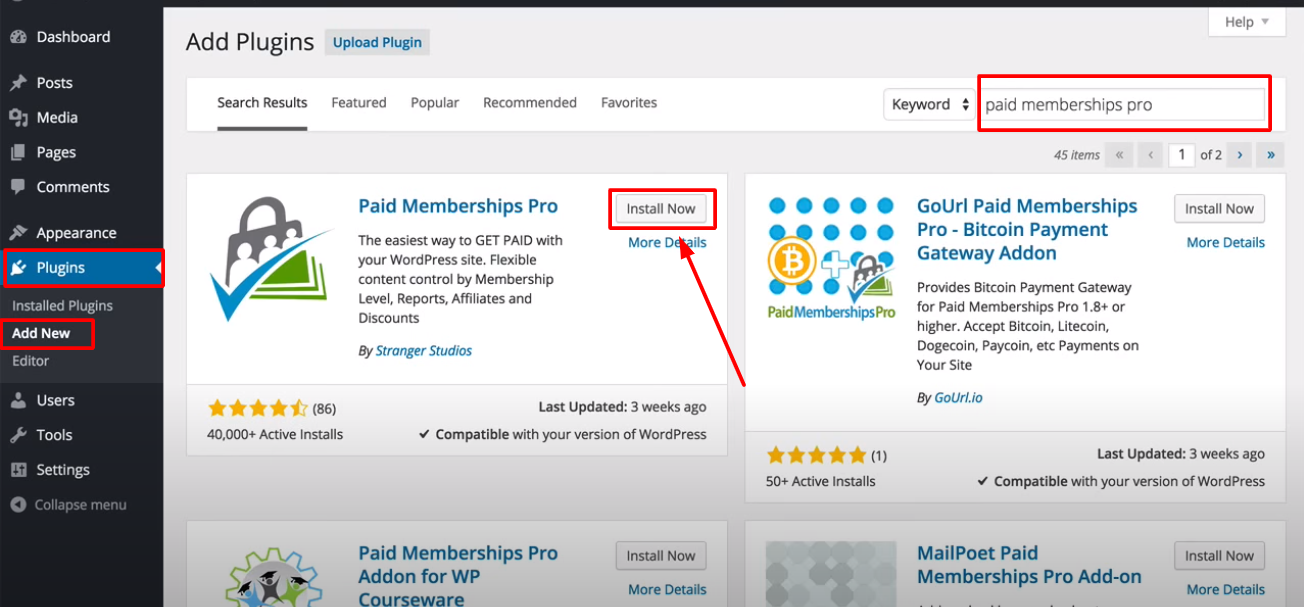
Step 2: Create a membership level
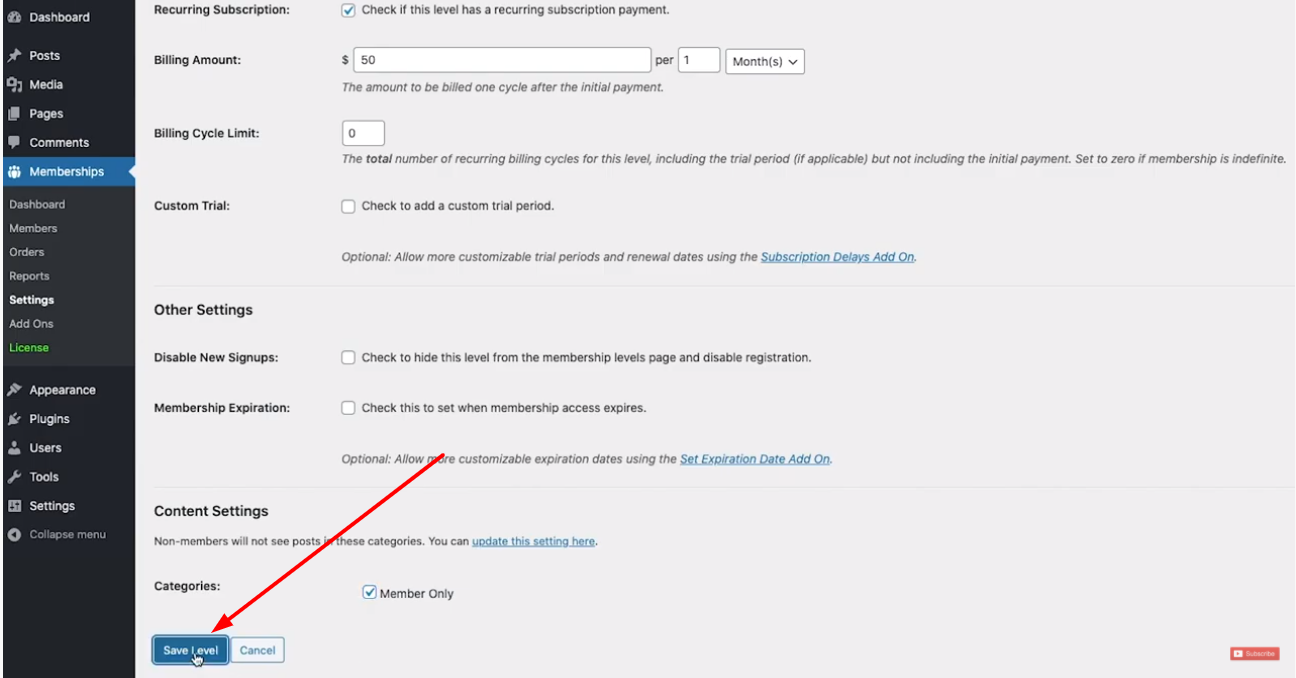
After you install your plugin, this is should be your next step if you want to create a membership website successfully. To proceed, find and open the Memberships tab on your WordPress dashboard. It should redirect you to your PMPro dashboard. From here click on Create a Membership Level under the Initial Setup menu. You can also find the Create Membership Level tab by clicking on Settings > Levels.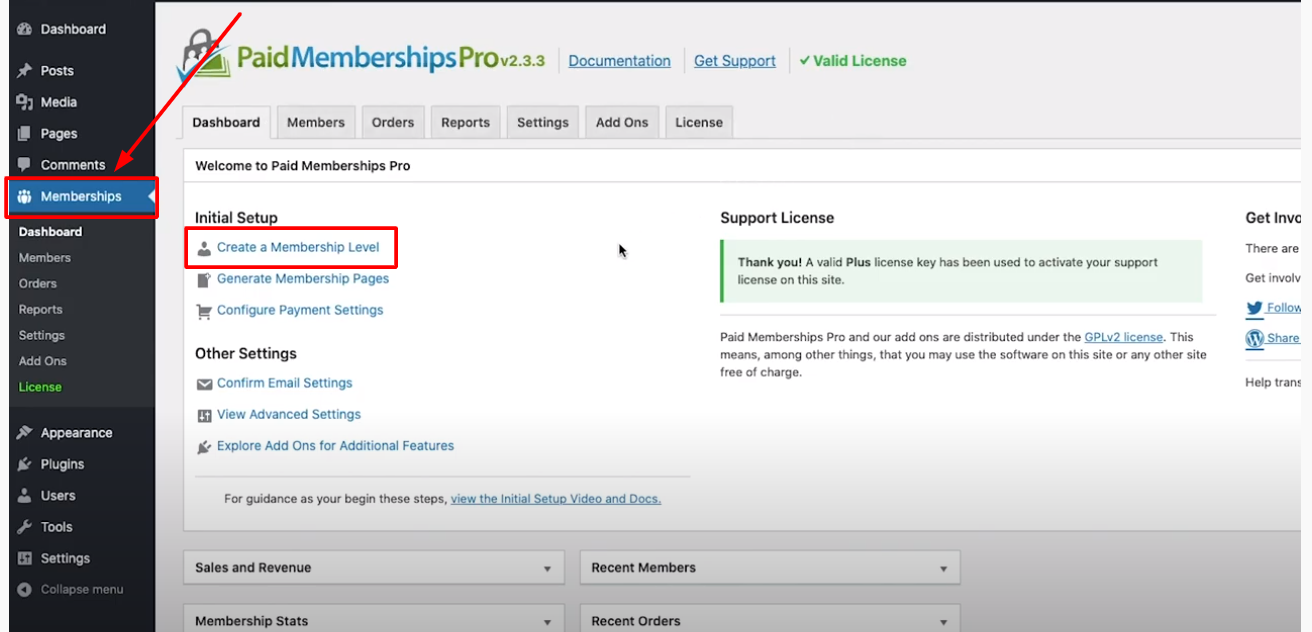 After that, customize your membership level. That is:
- Add a name of your membership level
- Fill in the description field- This is to give users what to expect when they sign up at this level
Step 3: Set up membership pages
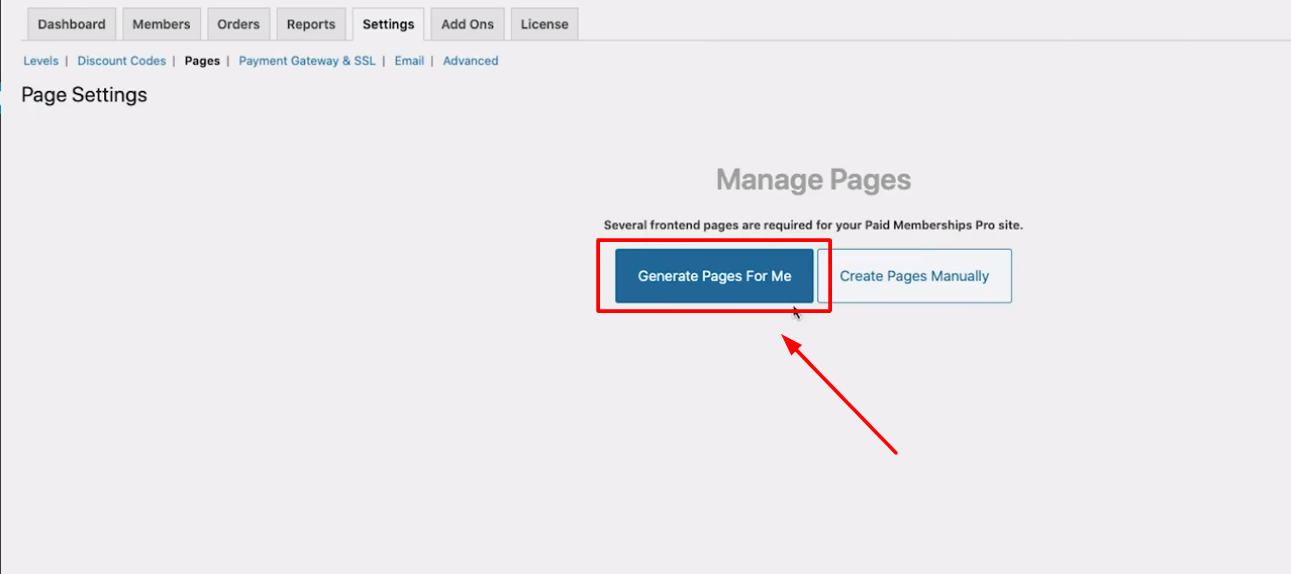
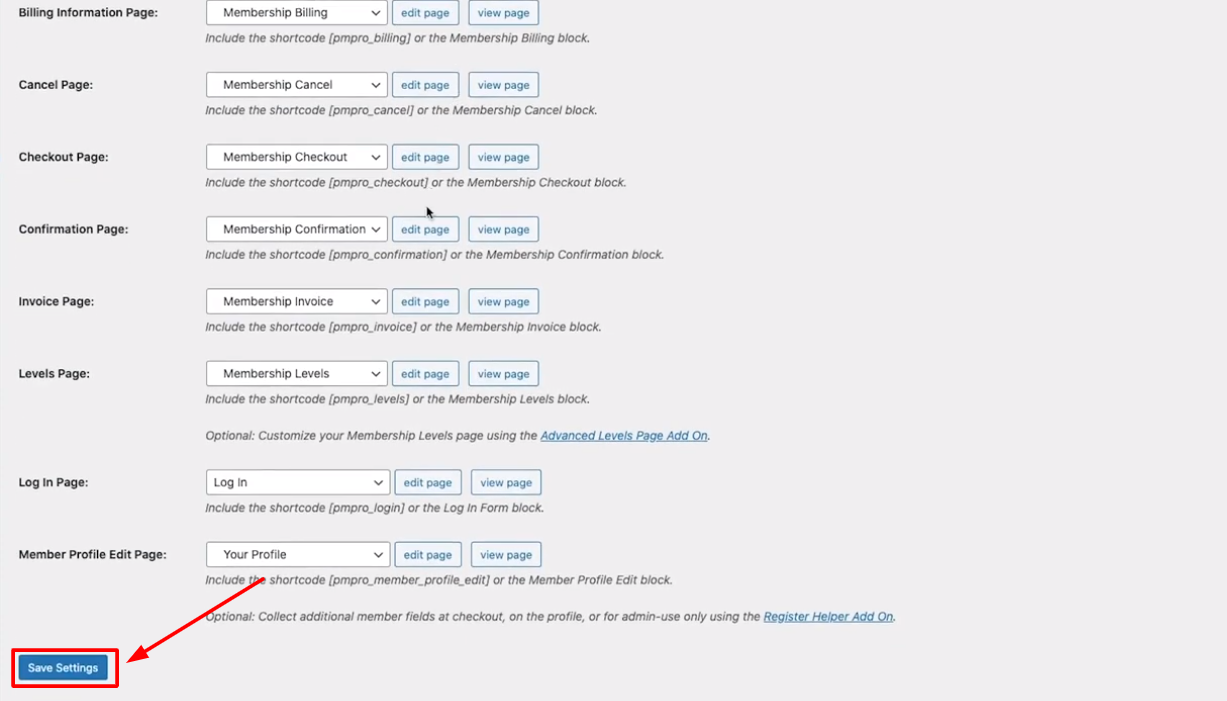
The next step is to set up membership pages. These are all the front-end pages that you need to start your membership site. On your dashboard, click on Memberships > Generate Membership Pages. Alternatively, access this tab by opening the Settings tab > then Pages.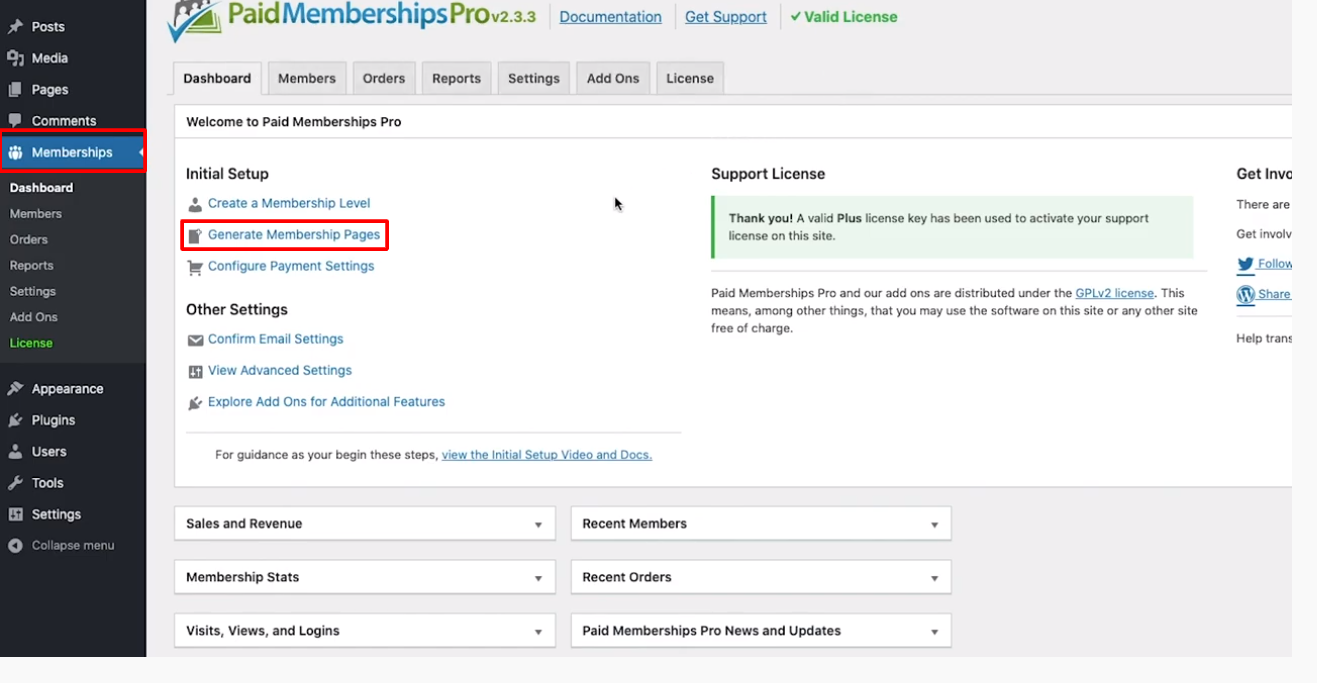 Here, you can let the PMPro generate the pages for you or decide to create them manually. To speed up the process, let the Paid Membership Pro generate the pages for you. If you’re not satisfied, you can always edit the pages yourself.
 Once you’re done, scroll down at the bottom and click on the Save Settings button.
Step 4: Add a payment gateway
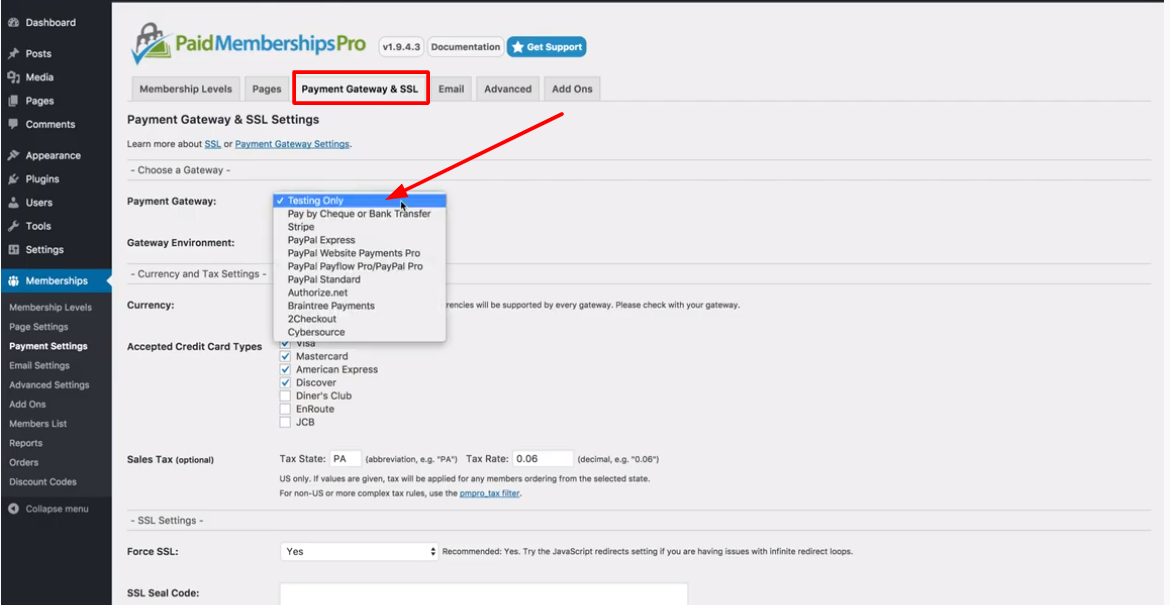
If you’ll be charging for memberships, then you’ll need a payment gateway. But before you set up a payment gateway, be sure to check out the supported Payment Gateway options and determine which one suits your needs. Some of the gateway options with Paid Memberships Pro include:- PayPal
- Stripe
- Payfast
- Braintree Payments
- Authorize.net
- CyberSource
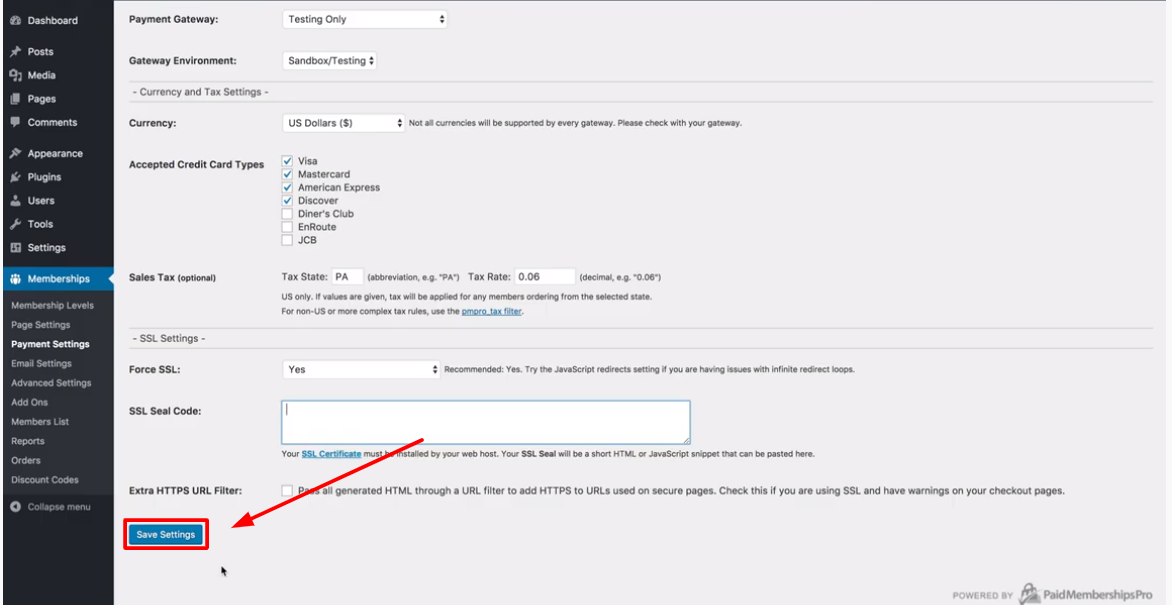
 Click Save Settings below after you’re done.
Step 5: Email settings
The email settings function allows you to send emails to your subscribers once they sign up for your membership. To get started with the email service, select the Email Settings tab under the Settings menu tab. Add your email address, and fill in the available fields, i.e. Send Email From, Customizing Email Content, Email Deliverability, and Other Email Settings.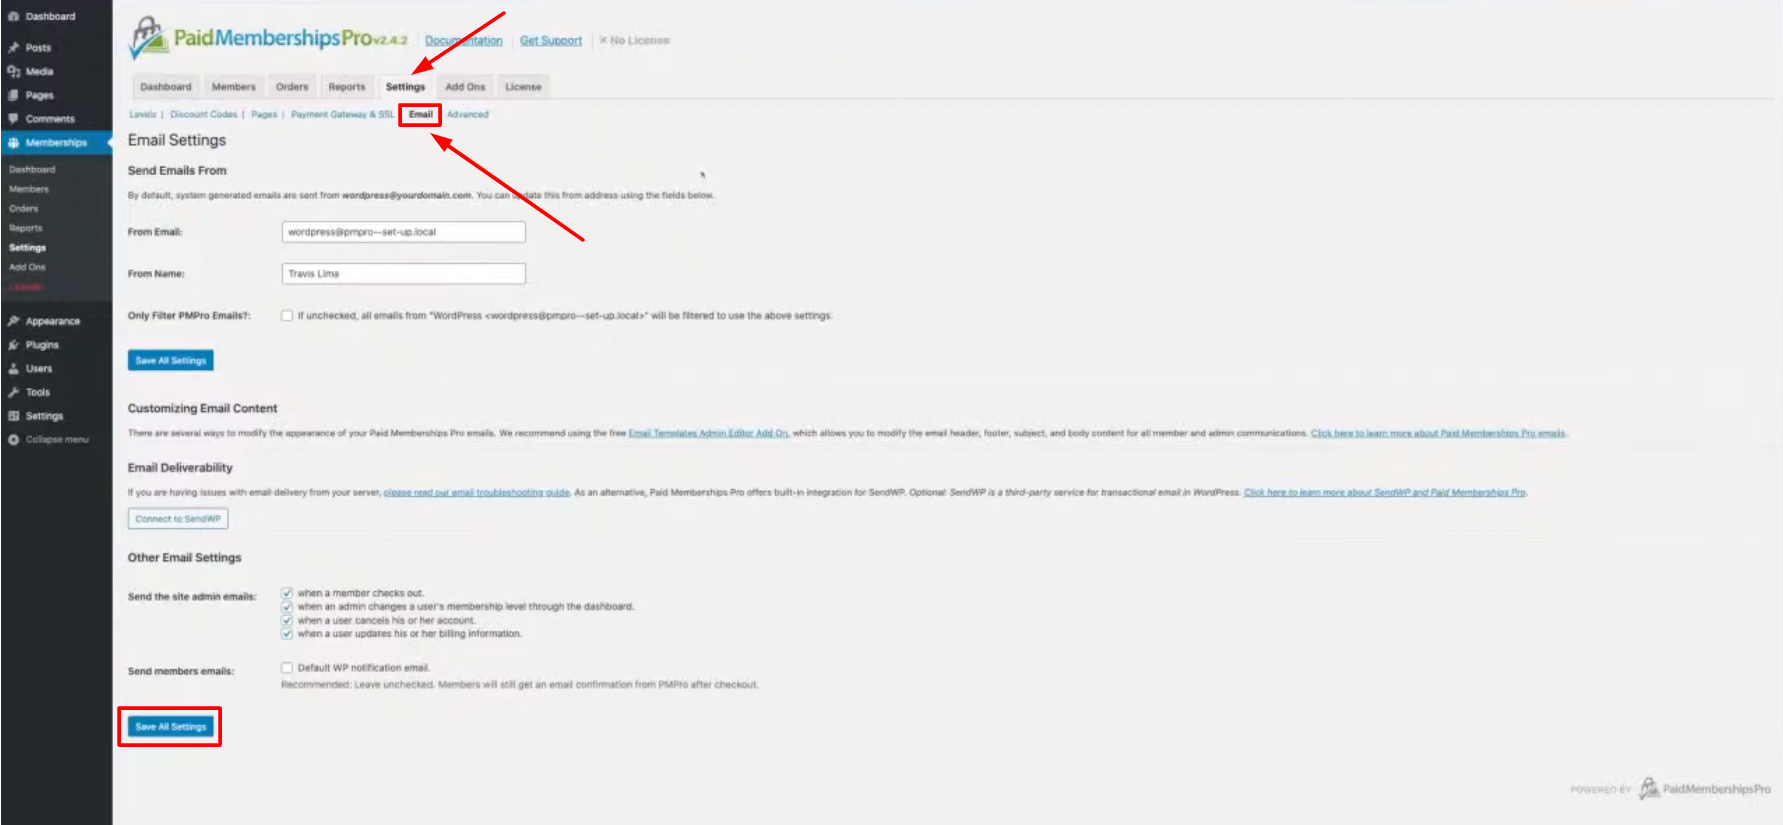 Once the setup is complete, click the Save Settings button to save your changes.
Step 6: Configure the advanced settings
Basically, this is just about making the settings that we didn’t find from the other steps. To configure the settings, navigate to the Settings tab > Open the Advanced tab to access the Advanced Settings admin page.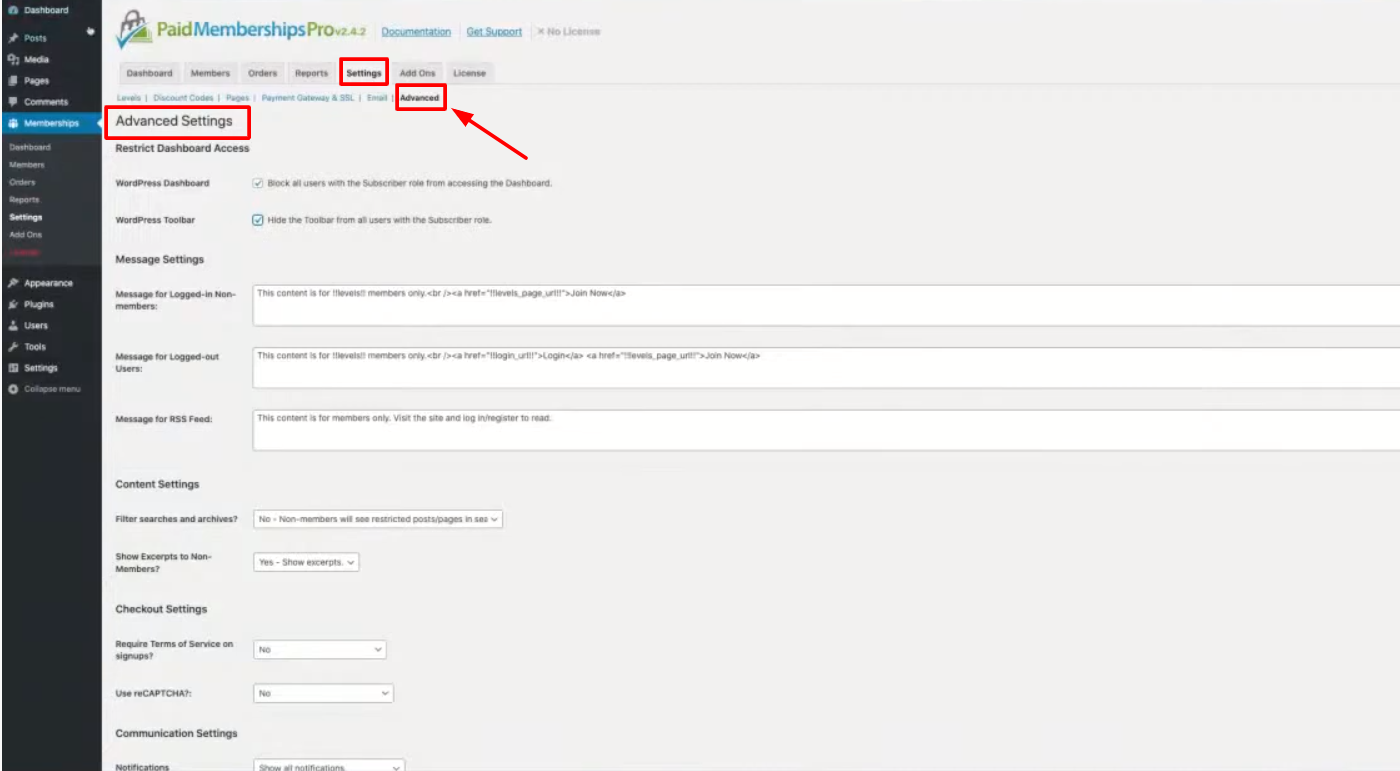 Here, you can make settings such as:
- Restrict access or block unsubscribed users from your dashboard
- Message settings, including editing the message for non-users when they try to access premium content
- Setting up your Terms and Conditions
- Etc
Step 7: Congratulations, you’re done! Now, the testing phase
Once you have set up your membership successfully, it’s important to test whether everything aligns or if it’ll work. Below are some basic steps for testing your membership signup:- Navigate to one of the members-only content—you can try a post in the locked-down category
- Then open the registry link > Go to Membership Levels page and select a level to test the checkout

